Scenario 7 - The Haunted Houses
Compiled by Alan, of Tring Wargames Club
A “village” of six small huts has been found in an area of derelict and disused houses. These small buildings seem to have been used as a storage area of some kind, but the buildings appear out of place - they resemble thatched native huts from the Dark Continent.
Is this a clue of some kind to the appearance of the Zombies in London, or does only fiendish danger lurk within?
Set-up
The players deploy in the usual way and activate in usual way. Six cache tokens (possibly containing valuable clues) are concealed, one in each of the six huts.
Card Choice
|
Survivor |
Zombie |
Tank zombie |
Zombie Horde |
The Round ends. |
Zombie Rising |
Random Occurrence Card |
|
4 |
4 |
0 |
0 |
1 |
1 |
0 |
Spawning Points
The Players each place a spawning point in the usual manner as supplies etc. Spawning occurs normally from these spawning points.
Special rules
Every time a figure enters a native hut the player rolls 2D6; on 8+, a Zombie Liche appears and is placed randomly within 2” of the figure. A Zombie also appears on a roll of 7 or more and is placed randomly within 2” of the figure. When the Liche arrives it activates immediately. Only one Liche can be present any one time.
Liche rules
Very occasionally, a zombie retains a degree of intelligence. A Liche is always considered to be “active”, on any Black Number card. The Liche ignores “Knockbacks” and the figure is removed when a 2nd wound is inflicted.
If at any point in the Liche/Witch’s turn, a survivor is within 10”, the Liche/Witch may “call” other Zombies within 30”, with a high- pitched wail/moan, that counts for zombie activation, for the rest of the ROUND (i.e. deck of cards).
Victory points
Each Zombie destroyed is worth 1 point; each Zombie Liche or Tank destroyed is worth 5 points to the player. A supply cache when recovered and carried off-table is worth 1 point, and may contain a clue to help explain the existence of the Zombies in London. To obtain the points or clues, the figure needs to survive the game.
The Adventure
The game began with the deployment of items of interest (the supply tokens), according to the scenario rules, and then with deployment of the Zombie Spawning Points according to the scenario rules. All of the Spawning Points ended up in, or close to the entrances to, the “village” of native huts.
The Society of Africa team added a new character (Prof Horatio Plum, a colleague of their leader Dr Somerfield), armed with his trusty butterfly net. The other teams went with their current members.
The Bow St Runners had re-armed PC George Dixon with petrol bombs, since the other teams had demonstrated their usefulness.
Henry opted for the Southwest corner of the board as a deployment point; Alan took the Southeast corner, while Martin chose the Northeast corner.
Alan now had the most Victory points, so he had the Initiative for the first move. On subsequent turns, we diced for the Initiative, and then proceeded clockwise around the table from the high roller.

Fig 1: The terrain looking North-west
The first turn commenced with a Human move. All teams moved from their respective jump-off points towards the native huts at the centre of the table.
The Zombies then got no less than three moves in succession. Unfortunately for them, there were at that point no Zombies on the table, so on the next Human move, all three teams continued their advance.

Fig 2 The Society of Africa closes in on the nearest corner of the native village
A Zombie Restock then gave them six Zombies, a Zombie Tank, and a Zombie Horde, as reinforcements.
On the next Human move, The Butcher St Boys continue their usual tactics of cautious advance. Sgt Calahan of the Bow St Runners killed one Zombie with his shotgun, and his team-mates also advanced slowly towards the village.
The Society of Africa decided on a bolder approach. Leaving the others to fight the newly-appeared Zombies, Scoop rushed forward and made contact with the native hut nearest the Runners’ corner of the village. He successfully grabbed the supply token, but in accordance with the scenario rules, in doing so he activated a Liche and a Zombie. The Liche tried to grab Scoop but failed, while the Zombie was just too far away.
The effort was not without a cost however. While Rose killed one Zombie, Lord Dunce was wounded by another, though fortunately not infected. Both Rev Green and Harry attacked the Zombie Tank, but with no effect. Brian fired his shotgun at the Liche, and got a kill result, but of course a Liche requires two “kills” to finish it off, so it was merely “wounded”.
The Humans then got another move, and fortunately for the Society members, the Butcher St Boys were close enough to the far side of the native village to attract the Zombies clustering in the centre. The Bow St Runners had also arrived at the edge of the village, but were displaying far more caution than their customary gung-ho approach.
For the Society, Scoop used the opportunity to escape from the village carrying his supply token with him. Brian shot at the Liche but missed this time, and Kate was unable to shoot her pistol for fear of hitting one of her own team members. Meanwhile the duel with the Tank continued – the Rev Green tried to hit it with his heavy Bible and got one “kill” result, but Harry failed in his melee and was killed (so he was out for the rest of the scenario), while Lord Dunce did succeed in getting a “kill“ result on the tank facing him. As with the Liche though, a Tank requires multiple “kills” to finish it off, so in both cases they were merely “wounded”.
Fred, Rose and Prof Plum fell back into the ruined houses, in the hope of drawing off some of the Zombies which were surrounding Rev Green and Lord Dunce.

Fig 3 The Society fights the Tank and Zombies while Scoop escapes with a supply token
Meanwhile, the Butcher St Boys were engaging in their trademark long-range fire on the Zombies on their side of the village. Their shooting was about what we have come to expect during the campaign, however; they missed everything except one member of the Zombie Horde. The Duchess threw one of her petrol bombs, and succeeded in immolating two Zombies perilously close to the Society of Africa team.

Fig 4 The Butcher St Boys engage the Zombies at their end of the village
The Bow St Runners also appeared to be playing things cautiously this time. They had split into two teams, and one group fired at the Zombies on the nearest Spawning Point; Insp Gadget tried to “bag” the Liche, which was already “wounded” and therefore potentially vulnerable, but he only succeeded in getting a Knockback result, which was ignored by the Liche.
The Runners’ other group appeared nonplussed to find that the Society had seized the supply token from the hut nearest their corner of the village.
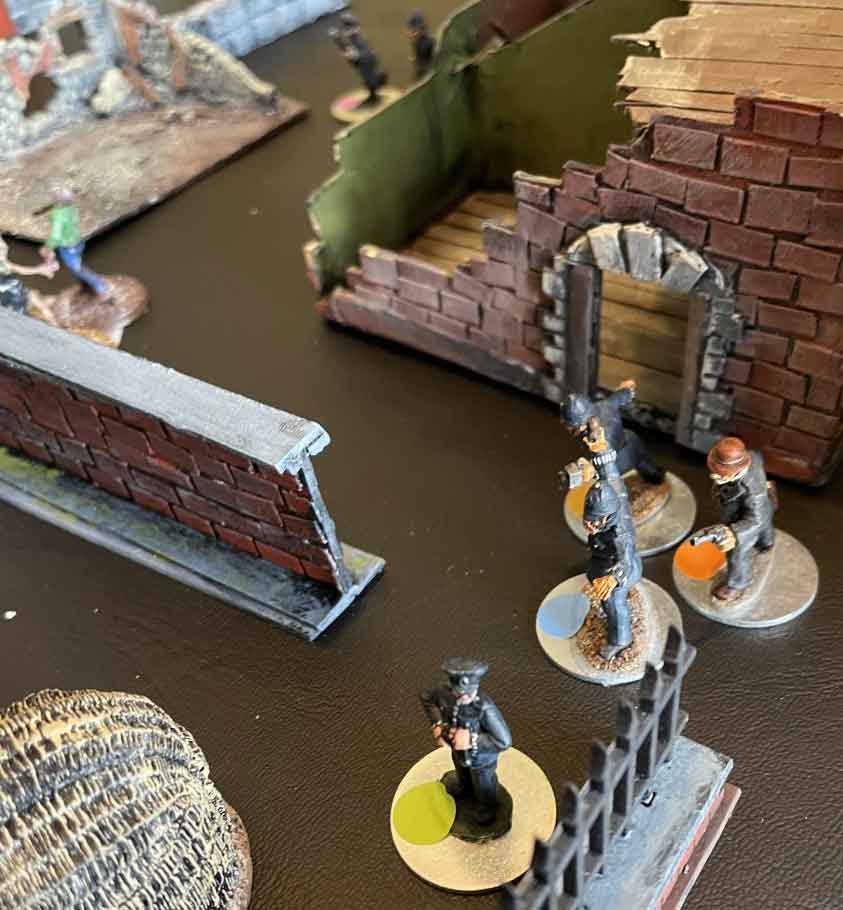
Fig 5 The Bow St Runners look undecided at one corner of the native village
That ended the first turn.
In turn 2, the Zombies got their automatic Restock, which gave them another five Zombies and a Tank, and the turn then immediately ended.
In turn 3, the Zombies automatic Restock earned them another bunch of Zombies, plus yet another Tank, as reinforcements. Things were beginning to look very ugly for the Society of Africa; they were now fighting no less than three Tanks at their end of the village.
The Zombie Tanks then got a move. One of them attacked Rev. Green and another Lord Dunce; Rev Green was able to put a second wound on his, but Lord Dunce was wounded a second time by the Tank he was fighting.
Meanwhile, the third Zombie Tank hurled debris at Brian, and succeeded in killing him (so he was out for the rest of the scenario). A Zombie pursued Prof Plum into the ruins, but could not quite reach him.

Fig 6 Desperate times for the Society of Africa facing three Zombie Tanks
On the next Human move, the Bow St Runners took a heavy toll on the Zombies which had populated the Spawning Point nearest to them. PC Dixon threw a petrol bomb, killing five, while Sgt Calahan despatched another with his shotgun. Insp Gadget tried for another long-range shot against the Liche, but missed. The remainder of their team retreated from the village through a derelict house.
For the Society, Kate missed with her shot, but Scoop hit and killed off the Liche. Rev Green successfully wounded the Tank which was facing Lord Dunce, but once again Dunce could only achieve a draw.
In the ruined buildings, Rose attempted to Wrestle Free from the Tank pursuing her, and succeeded, but Prof Plum failed to Wrestle Free of the Zombie attacking him. Forced to fight it for his second action, he was wounded in the melee.
At the other end of the village, The Duchess killed three more Zombies with a petrol bomb, and Purdy got a Knockback on another Zombie with his shotgun.
The Zombies then got a move. One attacked Lord Dunce, who was finally able to defend himself effectively, and killed it. Another two Zombies attacked Prof Plum, but he was able to beat off their attack with no ill effects. These were the only contacts, as the other two teams were too far away.
On the next Human move, Rev Green attacked the Zombie Tank nearest him, but his luck had finally run out, and he was wounded, though fortunately not infected. Lord Dunce attacked the Tank nearest him, but to no effect. Prof Plum finally rose to the occasion and killed the two Zombies closing with him, but the Society’s marksmanship had fallen to Butcher St Boys’ standards, and their shots all missed.
Meanwhile the Duchess used another petrol bomb to incinerate four Zombies; the remainder of her team could not see any other Zombies to shoot at.
The Bow St Runners two sub-teams reunited behind the derelict houses.
The Zombies then got another move. No less than three Zombies attacked Rev Green, but were unable to injure him further. However, Prof Plum was attacked by two more Zombies in the ruined building, and in the ensuing melee, he was killed (so he was out for the rest of the scenario).
The Zombies then got a Restock, giving them another six Zombies and two more Hordes; most of these were concentrated at the Butcher St Boys’ end, so it was pretty clear that they would not be able to fight their way into the village.

Fig 7 A heavy Zombie concentration at the Butcher St Boys' end of the village
That ended the third turn.
In turn 4, the Zombies got their automatic Restock, which gave them another five Zombies and a Horde.
The Zombies then got a Tank move, which was really bad news for the Society of Africa, who were still facing all three of them currently on the table.
The first Tank attacked Rose, and she achieved a “kill” result, which means it was “wounded”. The second Tank attacked Rev. Green, and he was wounded again, though again he escaped infection. The third Tank attacked and killed Lord Dunce (so he was out for the rest of the scenario).
That ended the fourth turn.
In turn 5, the Zombies got their automatic Restock, which gave them another six Zombies and a Horde.
The Zombies then got a move. Rev Green was attacked, bitten and infected, although he was lucky enough to roll a whole six turns before he would “Zombiefy”. Kate was also attacked and bitten, but fortunately not infected.
The Zombies then got a second move, which enabled them to make many more contacts. In the ensuing fights, Purdy killed two Zombies, and the Duchess and Dapper Dan accounted for one each.
PC Plod also killed a Zombie, but Insp Gadget was killed in his melee (so he was out for the rest of the scenario), while PC Dixon was wounded and infected. Fortunately for him, Dixon was able to Wrestle Free with his second action, and fell back to rendezvous with Dr Watson.
For the Society, both Scoop and Dr Kate Somerfield were killed in their melees (so they were out for the rest of the scenario).
In the next Human move, PC Dixon was “Stabilised” by Dr Watson, while PC Plod attacked and killed a Zombie. Sgt Calahan killed one Zombie out of the nearest Horde, but Sgt Carter missed a second one.
Meanwhile, Rose could only achieve a draw with the Tank she was fighting, while Rev Green received a third wound from the one facing him. Rev Green was now effectively surrounded, with no way out.

Fig 8 No escape for the Rev Green
Fred used a petrol bomb to kill two Zombies from the nearest Horde, effectively downgrading it to a single remaining Zombie.
The Humans then got another move. For the Butcher St Boys, the Detective and the Duchess killed a Zombie each, but the rest of the team lived up to their usual reputation as rotten shots, missing everything.
For the Runners, Sgts Carter and Calahan also missed, but PC Plod was able to evade a Grab by a Zombie he had allowed to get a little too close, and he fell back towards his team-mates.
For the Society of Africa, Rose was unable to Wrestle Free from the Tank facing her, so she was forced to fight it with her second action. She was wounded in the melee, but fortunately not infected by the Zombie’s bite.
At this point, we belatedly realised that we had not been considering the effects of “wounds” on the attacks made by the Zombie Liche and Tanks; the Society’s fighters should have been doing a lot more damage, and receiving less, than they were. It was too late to refight all the combats up to that point, so all we could do was to apply the combat rules correctly in subsequent combats.
Fred had one petrol bomb remaining, and Alan was reluctant to deliberately target Rev Green and the large number of Zombies surrounding him, but Henry and Martin persuaded him it was the “humane” thing to do. Fred achieved a direct hit, killing two Tanks, and three Zombies, along with the Rev Green (who was then out for the rest of the scenario).
On the next Human move, the Society of Africa was by now in desperate straits, and their luck continued to desert them. Rose failed to Wrestle Free from the Tank facing her, but she did hold the melee to a draw. Fred raced across to try and help her.
The Butcher St Boys fell back as the Zombies advanced towards them, and their marksmanship was up to its usual abysmal standard at this point; they missed everything. The Bow St Runners also fell back, although Sgt Calahan did manage to kill another Zombie.
The Zombie Hordes then got a move, and they advanced towards the Bow St Runners and the Butcher St Boys. Contact with the Runners was avoided by the narrowest of margins – lucky, as contact with a Horde is an automatic kill.

Fig 9 The Zombies pursue the Boys and the Runners
In the next Zombie move, the Detective and the Doctor for the Boys were the only contacts, but they were both able to kill their attacking Zombies.
The Butcher St Boys then fell back again, as the Zombies had closed with them considerably. The Detective achieved a Knockback result on one Zombie, but the others achieved their usual shooting results.
For the Runners, PC Dixon threw a petrol bomb and managed to miss everything with it, while Sgt Carter killed one Zombie from one of the Hordes.
For the Society, Fred attacked the Tank that was facing Rose, but was unable to damage it. Meanwhile Rose, despite her own wound, managed to inflict a second one on the Tank.
That ended the fifth turn.
In turn 6, the Zombies got their automatic Restock, which gave them another eight Zombies and a Horde.
The Bow St Runners got off to a good start, with Sgts Carter and Calahan each killing a Zombie with their shotguns, while PC Dixon threw his last petrol bomb and killed another.
For the Society, Fred and Rose both attacked the Tank facing them, and Fred got a third “kill” result on it, which successfully despatched it.

Fig 10 Fred and Rose finish off the Tank facing them
The Butcher St Boys fell back again, which was just as well, as the Zombies then got a move, which otherwise would have brought them into contact again.
In the ensuing Human move, all the teams decided to withdraw.
A final Zombie move saw most of the Zombies head towards the Bow St Runners, who were by now the closest remaining team to the centre of the table. However, there were no new contacts.
All three teams moved off the table in the next Human move, thus ending the game.
Tallying the Adventure
Under the campaign rules, Victory Points were awarded for gathering supply caches (1 point) and killing Zombies (1 point each), Liches and Tanks (5 points each). Wounds on Liches or Tanks counted for nothing, as they would simply regenerate.
No team successfully retrieved any supply tokens. Scoop from the Society of Africa was the only Human character to successfully enter one of the native huts and retrieve a token, but he did not survive the scenario, so the token (and the clue it may have contained about the existence of the Zombies in London) was forfeit.
The Bow St Runners obtained a total of 15 Zombie kills, and their Insp Gadget made his saving throw at the end of the scenario, so they gained all 15 Victory Points. PC Dixon, who had been wounded and infected by a Zombie bite, was healed in-game by Dr Watson, and therefore did not require a saving throw.
Insp Gadget will return for the next scenario, and will start with one wound.
The Butcher St Boys killed a total of 18 Zombies, and suffered no casualties, so they gained all 18 Victory Points.
The Society of Africa earned Victory Points for killing a total of 6 Zombies and 3 Tanks – 21 points. Actually, they killed more Zombies than this (Scoop killed one Zombie and the Liche, and Prof Plum killed two Zombies), but the responsible characters failed to make their saving throws, and therefore the points were forfeit under the scenario rules. The same applied to the supply token and possible clue retrieved by Scoop.
Lord Dunce, Prof Plum, and Scoop were all killed in this scenario, and failed to make their saving throws, so they are out of the campaign.
Harry, Dr Somerfield, the Rev Green, and Brian were also all killed in this scenario, but did successfully make their saving throws, so they return for the next scenario, which they will start with one wound apiece.
Rose was wounded in this scenario, but successfully made her saving throw, so she can return for the next scenario, fully healed.
Of the Society of Africa members, only Fred escaped this scenario unscathed. The Society of Africa thus earned a very Pyrrhic victory this time out.
No comments:
Post a Comment