Scenario 5 – The Walled Garden
When searching the ruined town, a walled garden in the ruins
of a manor house is found.
Set-up
In the centre of the board is a 12” square walled area
contains 6 statues each on a plinth. A
cache of supplies is at the base of each of the statues. Players deploy in the usual way and activate
in usual way.
Card Choice
|
Survivor |
Zombie |
Tank zombie |
Zombie Horde |
The Round ends. |
Zombie Rising |
Random Occurrence Card |
|
4 |
4 |
0 |
0 |
1 |
0 |
0 |
Spawning Points
The Players each place a spawning point in the usual manner
as supplies etc.
Special rules
As soon as anyone picks up a supply token the statue reveals
a Zombie, which activates immediately.
Victory points
Each statue-generated Zombie killed is worth 2 points to the
player. Other Zombies are worth their usual points values. A supply token when
recovered is worth 1 point to the player.
To obtain the points, the figure needs to survive the game.
The Adventure
The game began with the deployment of items of interest
(supply caches) according to the scenario rules, and then with deployment of
the Zombie Spawning Points according to the scenario rules.
All Spawning Points ended up inside the garden, but no
Zombies had put in an appearance yet.
The Society of Africa team added a new character (Brian, armed
with a replacement shotgun), and each team also beefed up their skills and weapons
to the extent allowed.
Martin’s Bow St Runners deployed Sgt Calahan to replace PC
Dibble who had been killed in the previous scenario, with his Bow St Runners,
and he would receive a shotgun. Sgt Carter would retain the use of the shotgun
he had in the last scenario, so it appeared that the Runners intended to rely
on superior firepower for this scenario.
Henry’s Butcher St
Boys team was unchanged.
Henry opted for the Southwest corner of the board as a
deployment point; Alan took the Southeast corner, while Martin chose the
Northeast corner.

Fig 1: The terrain
looking North-west
Martin still had the most Victory points, so he had the
Initiative for the first move. On subsequent turns, we diced for the
Initiative, and then proceeded clockwise around the table from the high roller.
The first moves saw all teams heading for the entrances to
the garden, as there were no Zombies around to worry about. Suddenly, however,
nine Zombies put in an appearance, blocking the nearest entrances to the three
teams. The Zombies then got a move, which resulted in them making contact with
the Society of Africa team. Lord Dunce
killed one Zombie, but the Rev. Green could only manage a stand-off in his
melee.

Fig 2 Lord Dunce and
Rev Green lead the Society of Africa assault on one garden gate
The Zombies then re-stocked at the start of the next turn,
earning themselves no less than seven Zombie reinforcements, plus a Zombie
Horde, which was close to the garden’s southern wall, where it could prevent
the Butcher St Boys using the southern gate, as well as present a threat to the
Society of Africa if they entered the garden.
They immediately followed up with a Zombie move, but since
there was still only a single contact, the Society’s Rev Green fought a 1:1
melee. He lost, and was immediately declared dead. He would get a saving throw
at the end of the scenario, but for now he was out of the game.
In retaliation, Brian killed a Zombie with the shotgun, and
Lord Dunce killed another with his sword-stick. The reporter Scoop fired his
pistol but missed, and Fred tried a petrol bomb, but also missed completely,
doing no damage to anything, apart from some blistered paint on the garden
railings.
For the other teams, Purdy of the Butcher St Boys let fly
with his shotgun, but missed. The Bow St Runners are closer to the action, and
both Sgts Carter and Calahan let fly with their shotguns, and both missed.
Meanwhile PC Plod managed to kill a Zombie, and a second Zombie Grab on Plod
failed.
On the western side of the garden, the Butcher St Boys had
found themselves a cosy little niche from which to play. The Zombies attracted
to them by their scent had been halted by the railings of the garden, which
they were unable to break down, and meanwhile they were prime targets for the
Boys guns. Unfortunately, their shooting was not quite up to the mark; Purdy
killed one Zombie with the shotgun, but the Detective and Dr Watson both missed
with their pistols.

Fig 3 The Butcher St
Boys prove less than effective in the Zombie “shooting gallery”
Meanwhile, at the garden’s northern gate, the Zombies had
more success, and they broke open the garden gate by sheer weight of numbers,
and scrambled towards the Bow St Runners. Faced with a “target-rich
environment” however, the Runners proved equal to the task, and Sgts Carter and
Calahan, Insp. Gadget, and PC Plod all killed a Zombie each, thus despatching
all of the Zombies that had made it out of the garden.

Fig 4 The Bow St
Runners kill all the Zombies outside the northern garden gate
The Society of Africa was doing a similarly good job of
clearing the garden’s eastern gate. Brian shot and killed one Zombie, and while
Scoop missed with his pistol, Kate was able to kill a second Zombie with hers.
Fred threw a petrol bomb over the garden railing, which successfully immolated
two more Zombies, including one from the first Zombie Horde. Rose the maid and Lord Dunce tried to follow
up by advancing through the narrow gate, into the garden. However, Rose ended
up standing right on a Spawning Point – the folly of this position would become
apparent later.

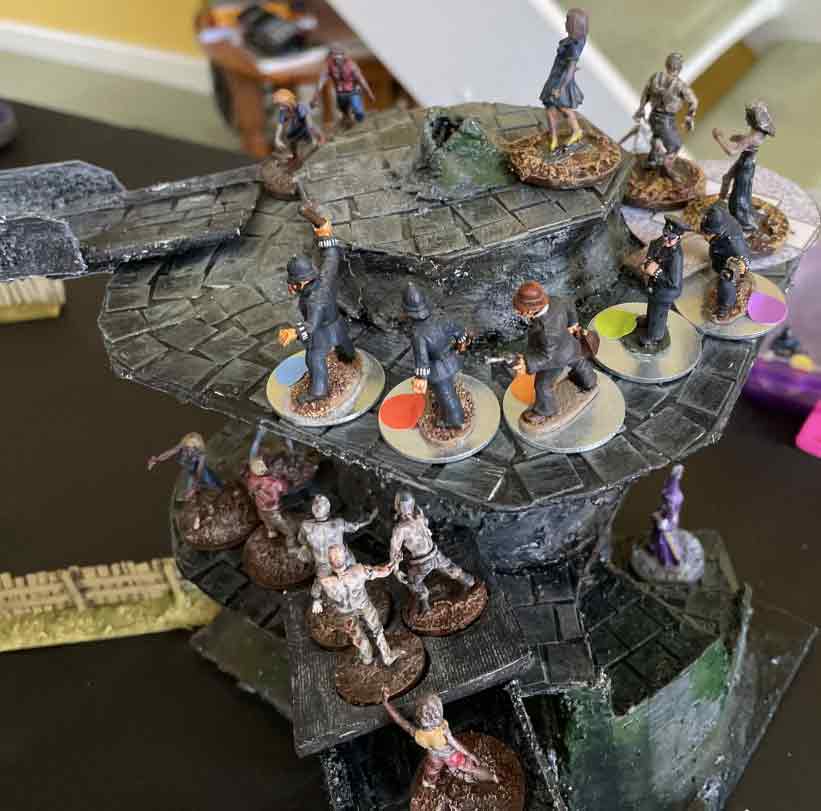
Fig 5 The Society
fight their way through the eastern gate; Rose ends up on a Spawning Point
At this point, the turn ended again, and the Zombies
restocked. This time they got a total of six reinforcements, plus a second
Horde; this one was also on the Spawning Point close to the garden’s southern
wall.
The Butcher St Boys continued their shooting duel with the
Zombies lining the garden railings, but with little more success than before. Purdy
got a Knockback on one with the shotgun, but both the Detective and Dr Watson
missed again with their pistols. The Boys seemed to be of the opinion that
discretion was the only part of valour, and were making no obvious attempt to
enter the garden itself.
The Bow St Runners, however, were more than making up for
the Boys’ lack of bravado; they seemed to have learned little from their narrow
escapes in the last two scenarios.
PC Plod, seeing the garden gate unguarded by Zombies,
charged through, and reached the northwestern-most statue, to grab its supply
cache. Doing so triggered a Zombie appearance, and in the ensuing melee, Plod
was wounded.
Sgt Carter moved through the gate in support, and then shot
and killed a Zombie. Sgt Calahan followed suit, and succeeded in getting a
Knockback on a second Zombie.
Dr Watson moved through the gate to make base contact with
PC Plod, and then used his second action to heal Plod’s wound. This represented
the first use of the Doctor skill in the campaign; up to that point we were
beginning to think it was pretty useless.
Meanwhile for the Society, Fred threw a petrol bomb ,
killing a Zombie, and another one from each of the two Zombie Hordes by the
southern gate. The first of these was consequently reduced to a single Zombie,
so it in effect it ceased to be a Horde at all.
Kate fired her pistol, achieving a Knockback on another of the Zombies
in the second Horde.
By the eastern gate, Rose put her trusty hatpin to good use,
killing another Zombie, but Lord Dunce could only achieve a draw with the
Zombie he was meleeing with.
In the ensuing Zombie move, several new contacts were made
with the Human teams, but the Zombies failed to achieve any further combat
successes. Quite the contrary – PC McGarry 452 and PC Plod each killed a Zombie
in the garden’s northwest corner, while Rose and Lord Dunce killed one each by
the eastern gate.
However, just as it looked like the garden might be cleared
of Zombies, they got an opportunity to Restock, with no less than eleven
reinforcements scattered evenly round the garden on the Spawning Points.
This time the Human teams were not so fortunate. Dunce
succeeded in killing the Zombie facing him, but this time Rose could only
manage a draw. For the Bow St Runners, Sgts Calahan and Carter achieved draws
with their opponents, and while PC McGarry 452 did kill another Zombie, PC Plod
was both bitten and infected by the Zombie facing him.

Fig 6 PC Plod is
bitten and infected in the furious melee in the garden's northwest corner
Meanwhile, the Butcher St Boys tactic of hanging back and
only engaging the Zombies with firearms was not paying off. Although they were
not at much risk of casualties, despite their best efforts, not a single team
member managed to score any points by killing Zombies either.

Fig 7 The Butcher St
Boys shoot at the Zombies through the garden railings but miss every shot
Once again, the turn ended again, and the Zombies Restocked.
This time they got another seven Zombie reinforcements, plus a couple of Hordes.
It was at this point that the folly of Rose standing on a Spawning Point became
apparent – when it produced a Horde, she was faced with immediate death, unless
she could kill two of the three Zombies comprising the Horde in the resulting
combat.
Amazingly, Rose and her trusty hatpin did precisely that. In
killing two Zombies (by virtue of rolling high in the melee, and thus having
spare pips on her combat dice roll), she reduced the Zombie Horde to a single
Zombie, and therefore she avoided the automatic death result for being in
contact with a Horde.
The Bow St Runners now appeared to recognise the imminent
danger they were in. Sgts Carter and Calahan and Insp. Gadget all retreated,
while PC McGarry 452 failed to wrestle free from the grasp of the Zombie he was
facing, but he did then succeed in killing it. PC Plod continued his melee with
yet another Zombie, but handicapped by his wound, he could only achieve a draw.
For the Society, Kate and Scoop both managed to kill a
Zombie each from the second nearby Horde with their pistols, downgrading it to
a single Zombie. Despite her success in the last combat round, Rose was still
outnumbered 2:1 in her melee, so she put up another great fight, and killed two
more Zombies. Her luck couldn’t last however - she was Grabbed by a third
Zombie as she tried to fall back through the eastern gate towards the rest of
her team, and was killed in the ensuing melee. She would get a saving throw at
the end of the scenario, but in the meantime she was out of the game.
The Butcher St Boys shooting accuracy had still not showing
any signs of improvement. Purdy fired his shotgun at the Horde nearest his
team, but only managed to achieve a Knockback result. The Detective also tried
with his pistol, and got a hit, but failed to do any damage.
On the next Human move, both the Society of Africa and the
Butcher St Boys started to fall back and regroup, as it looked like the garden
was all but impenetrable, with so many Zombie Spawning Points in position.
For the Runners, Sgts Calahan and Carter both killed a
Zombie, but Insp. Gadget missed with his pistol. PC Plod was still unable to wrestle free of
the Zombie closest to him and was hit again in melee, but luckily for him, his
thick coat absorbed the Zombie’s bite.
PC McGarry 452 was not so fortunate however; he lost his melee and was
killed. He would get a saving throw at the end of the scenario, but in the
meantime he was out of the game.
For the Society, Kate killed another Zombie with her pistol,
though both Scoop and Brian missed with their shots. Lord Dunce meleed with and
killed a Zombie which had approached too close to the garden’s east gate, then
fell back through it. Brian took up a new position firing through the railings
outside the east gate. At this point, all of the Society of Africa team was
safely outside the garden.

Fig 8 The Society of
Africa takes position outside the garden's east gate
The Butcher St Boys were still having no luck at all with
their weapons. All three team members fired and missed dismally.
Amazingly, the Humans then got yet another move. PC Plod
finally managed to wrestle free from the Zombie fighting with him, and fell
back to Dr Watson; he desperately needed to get his infection Stabilised, since
Plod was due to “Zombify” at the end of the current turn.
Dr Watson served his purpose by stabilising PC Plod, which
meant that he would not “Zombify” during the scenario, though he would still
have to make a stiff saving throw at the end of the game. Sgt Calahan fell back
to cover the nearest garden gate; clearly the Runners did not want a Zombie Restock
to cut off their line of retreat, as so nearly happened in the last scenario.
While Sgt Calahan moved to take up a new firing position by
the northern gate, suddenly the poor shooting skill of the Butcher St Boys seemed
to afflict all of the Human teams.
Sgt Carter could only achieve a Knockback result with his
shotgun against a member of the nearest Horde, and Imps Gadget missed
completely with his pistol. The Butcher St Boys missed everything they shot at
– again – while Kate and Scoop both missed with their pistols. Only Brian - the
new kid in the Society of Africa team, and who had not yet acquired any skill
with his shotgun - did any damage, killing yet another Zombie.
At this point, the Zombies got a Restock, and added a total
of seven reinforcements to their strength inside the garden. This was followed by the end of the turn,
whereupon the Zombies got another Restock, which added a further nine Zombies
and two more Zombie Hordes. The Zombies then immediately headed for the garden
gates, attracted by the scent of the Humans; it was becoming apparent that no
one was going to get into the garden in this scenario.

Fig 9 Zombies begin to
pour out of the garden's north and west gates
Unfortunately for the Human teams, it seemed that their
shooting prowess had deserted all of them. In the face of the overwhelming
numbers of Zombies making a beeline for them, the best they could achieve was a
single Zombie kill from each team. All three teams fell back in some disarray.
The Zombie Hordes then got a move. Fortunately for the
Humans, there were no team members within range, so they suffered no automatic
casualties.

Fig 10 Zombies begin
pouring out of the garden's east gate as well
Events virtually repeated themselves on the next Human move.
Sgt Carter killed one Zombie for the Runners, while Purdy bagged one for the
Butcher St Boys. The Society of Africa might as well have been firing blanks,
for all the good they could do.
At this point, the Zombies got two moves in succession,
which placed then in close proximity to some of the Humans. At that point the
turn ended again.
The Zombie Restock added another eleven Zombies on the
Spawning Points inside the garden. Clearly a lot was going to hinge on the next
few cards revealed, to see if the Humans could get away or the Zombies would
catch them.
The first move was a Human one, and the Butcher St Boys
moved off the table. Sgt Carter of the Runners killed another Zombie, and his
team then began to move off-table as well. The Society of Africa elected to
stand and shoot, but achieved nothing by doing so.
The Zombies then got a move, which meant that they got close
enough to Brian, who was covering his team’s retreat, to attempt a Zombie grab
in the next Human move.

Fig 11 The Zombies
almost catch Brian as he covers the Society of Africa's retreat
Luckily for Brian, the next move was a Human one; the Zombie
Grab failed, and Brian despatched the Zombie with his shotgun, before moving
off-table with the rest of the Society of Africa team.
With no teams left on the table, that ended the scenario.
Tallying the Adventure
Under the scenario rules, Victory Points were awarded for
gathering supply caches (1 point) and killing Zombies (1 point each).
NONE of the Human teams were able to retrieve any supply
caches in this scenario. PC Plod of the Bow St Runners had grabbed a supply
cache from a statue (which by the scenario rules was a worth 2 points), but he
dropped it again in the ensuing melee when he was wounded and infected.
Martin’s Bow St Runners had killed 12 Zombies – worth a
total of 12 points.
PC McGarry 452 failed his saving throw, and is therefore out
of the campaign.
Henry’s Butcher St
Boys had killed 6 Zombies – worth a total of 6 points.
Alan’s Society of Africa had killed 21 Zombies – worth a
total of 21 points.
Rose survived her saving throw, and therefore her Zombie
kills counted towards the Society’s total. The Rev. Green survived his saving
throw as well, but he will start the next scenario with one wound remaining.
The Society of Africa was awarded victory in this scenario.
Once again, it was universally agreed that this scenario was
a very enjoyable game, which confirmed that the modified Zombie movement and
spawning rules are working. No further rule changes were made after this
scenario, beyond a few minor points of clarification.