Pages

Friday, 13 October 2017

Memorial Evening 2017, another Dragon Rampant Mash-Up

Tring Wargames Club Memorial Evening – to celebrate the memory of members past.

For this year's Memorial Evening, on Friday 6th October, we had a Dragon Rampant Mash-Up similar to last year, but with even more players this time.
We were pleased that Chris's family called in to see the game and have a chat.

The Dragon Rampant game was a simple scenario.

Eleven players took part, each with their own retinue, starting all round the large table.
The objective was to get the treasure from the base of the monument in the centre and exit the table with it.
The players start to assemble.
The monument has yet to appear on the central hill.

The treasure lies beneath the monument.

The retinues were many and varied.
Alan's T.Rex.

Jim's Undead

Various beasties

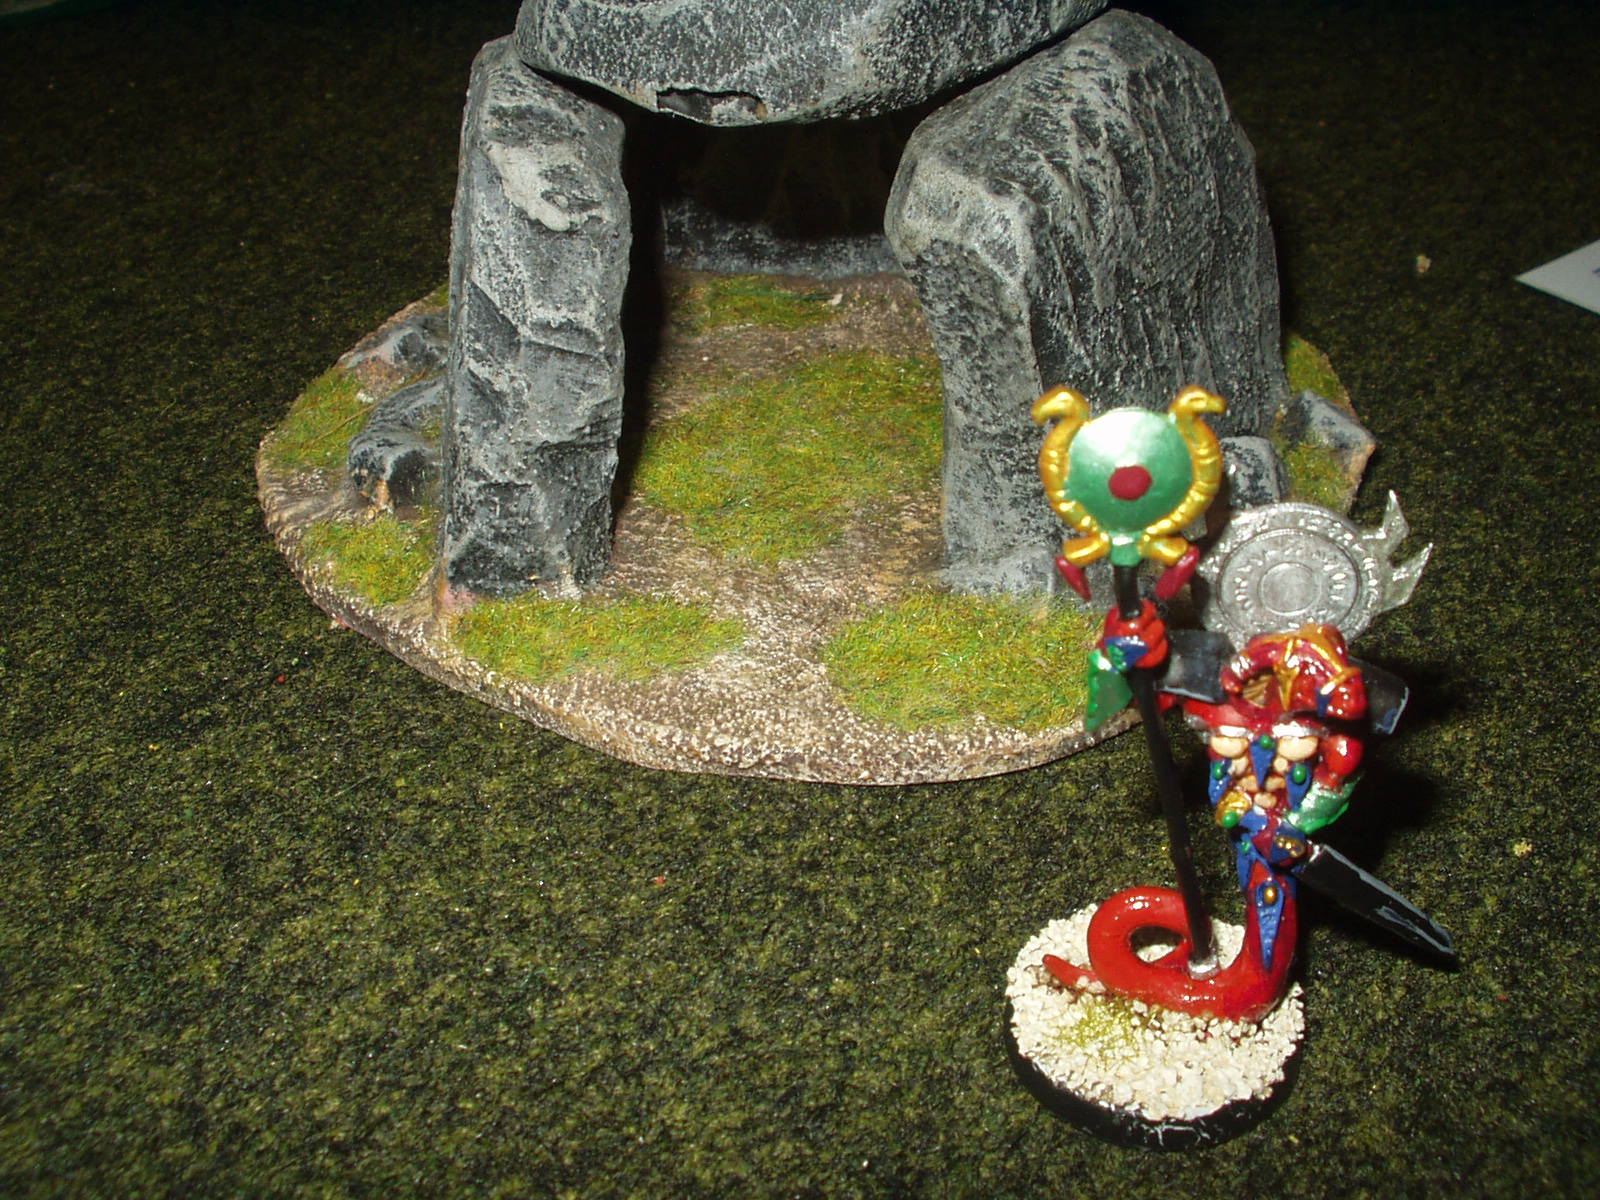
Graham's Serpent like single model units saved space on a packed table.

Attacks were banned for the first move to get things moving towards the objective. However it wasn't long before petty squabbles broke out between neighbouring retinues after that.
At the edge of table - Colin and Keiron totally ignoring the objective.

...and on Keiron's other side he and Neville come to blows.

Ian's riders round the hill to face Alan's monsters.

Ian R's infantry managed to mount the large hill with the monument.
Ian's infantry get onto the hill and head for the treasure
in the base of the monument.

As they grabbed the gold and try to make their escape, they were befuddled by someone (he he).
Ian's infantry grab the treasure but Colin's Spellcaster unit Befuddles them.
Neville's riders are ready to pounce on any opportunity.

Ian's infantry manage to break away from the hill and head for home with the treasure only to shot up by Keiron's missile troops and they routed leaving the treasure abandoned.
Horsemen and warbeasts battle over the monument hill trying to reach the treasure.


Neville's riders grabbed the treasure and made a bolt back to the table edge.


But they had a tough task doing that being somewhat surrounded, and Henry's Summoner suddenly popping units up as if out of the ground.
The riders with the treasure are at the foot of the hill and surrounded.

At the end of the evening some wandering halflings came across the treasure and wandered off with it, probably not knowing what it was, or perhaps what was round the corner.


Another fun game with everyone involved. Having these Memorial Evenings is a great way to remember missing friends.

Dragon Rampant rules were written by Dan Mersey, published by Osprey, and are widely available.

Sunday, 8 October 2017

Games Day - The Battle of Almanza 25th Apr 1707

At our October Games Day we re-fought the Battle of Almanza with 10mm figures using Black Powder rules. Almanza was one of the most decisive engagements of the War of the Spanish Succession. Despite the Duke of Marlborough's successes at the battles of Blenheim and Ramillies, Almanza ensured that securing the Spanish throne for the Hapsburgs became a near impossibility.  It is also notable as "probably the only battle in history in which the English forces were commanded by a Frenchman, and the French by an Englishman." The Allied commander, the Earl of Galway was a French Huguenot and the Franco-Spanish commander, The Duke of Berwick, was  the illegitimate son of James II (and incidentally the nephew of The Duke of Marlborough).

This was a very one-sided battle, so I devised a "what-if" scenario, allowing Galway's army to link up with the Earl of Peterborough's forces advancing from Catalonia. This made the Austrian claimant for the throne of Spain (Charles III) the nominal commander-in-chief of the allied army, advised closely by the Earl of Peterborough.

Between the pooled resources of various club members we were easily able to field the British, Dutch, Catalan, French and Spanish units required. Nobody had any Portuguese however, so we had to substitute Bavarians.

The two forces deployed in the traditional manner of the day, infantry in the centre with the cavalry on the flanks.
                                           Initial positions from the French side of the table
                                                   The Western end of the Franco-Spanish line 

On the western side of the field a ravine made the French hold their cavalry back, but in the open ground to the East they threw their horse forward. In the centre the Franco-Spanish infantry held their position (they were meant to be defending after all).

The Allied army advanced. In the East the Portuguese cavalry led a rush to meet the advancing French, in the West the first line of cavalry headed for a narrow gap between the ravine and the French Infantry and the second line advanced to the ravine to try and find a way across. The infantry lines plodded forward, but the British and Dutch advanced rapidly out pacing the Portuguese on their flank.

In the East the first lines of cavalry crashed together, although the Portuguese came off worse they performed much better than they had historically and inflicted heavy casualties in return. With units routing, retreating and following up the front lines became a disorganised mess. As the respective commanders tried to rally their units the second lines moved through to engage, with the same effect. This flank remained in utter confusion for the rest of the battle as officers rallied units and threw them back in piecemeal until all four brigades had broken due to their losses.
                                    With the first lines in disarray the second lines advance on each other.
                                                            A very confused cavalry melee

On the Western flank the front lines clashed in the narrow gap and fought inconclusively for a time. The Allied second line managed to cross the ravine but the French second line moved across to face them. After heavy fighting the allied horsemen fled, a broken brigade. As the French now crossed the ravine in turn, the Allied first line, who had pushed their opponents back, moved to block the French from out-flanking the allied infantry. Another fierce fight left the French victorious and the last Allied cavalry brigade fleeing the field.
                                                              The Western flank
                                                                    Allied cavalry advancing
                                               The remains of the Allied second line fall back

In the centre the British and Dutch closed with the French lines, whilst the Portuguese came on more slowly. The intention was to get into musket range and blast the French front line away with their superior firepower, then overwhelm the second line with superior numbers. However the Allies lost control (Blunder roll of 6) and the first line, instead of engaging in a firefight, charged with the bayonet. Some reached the French, but some didn't. Unsupported, the foremost units were thrown back, with one battalion routing away. Then the French concentrated their fire on the reminder of the Allied first line. 
                                                         The Allied second line attack....
                                                                   ....and retreat!
                                               That formation's not in the drill book!
                                        Compare everyone else's neat lines with the British brigades!

With the infantry attack stalling and his cavalry failing, Charles III decided to lead his Catalan infantry, held in reserve, out into the open East flank to try and catch the French in a pincer attack with the Portuguese. Unfortunately for him, events on the other side of the battlefield decided the result before they could close with the enemy.
                The Catalans advance (the shaken French dragoons in front of them will not slow them down).
                 A final view of the Eastern flank, in the bottom corner the Catalans are starting their advance

At this point the British commander should probably should have halted the second line and rallied the first line behind them, but seeing his cavalry starting to melt away and expose his flank he opted to throw the second line in and assault the French. They did rout one French battalion, but otherwise fared no better than the first assault and fell back in confusion. The British were now in a total mess, with the first and second lines intermingled, the officers desperately trying to rally units as the French stood and poured in musket fire and close range cannon shot. With mounting casualties the British front line morale failed and the brigade broke. Now with 5 out of their 9 brigades broken the Allies had no option but to quit the field leaving a French victory.

Friday, 29 September 2017

Sharpe's Ambush - A Participation Game for GamesFest, Tring

GamesFest is a convention held in Tring to showcase the best of Role-playing, Wargaming , Boardgaming and Science Fiction/Fantasy literature.

GamesFest
is held at:
Victoria Hall, Akeman Street, Tring, HP23 6AA
Date and time for this year are:
21st October, 2017. 10am - 5pm
Click here for the organiser's Facebook page


Last year Tring Wargames Club was invited along to represent historical wargaming with a demo game and it went very well.

Tring Wargames Club
will be running a Participation Game at this year's GamesFest.

Sharpe's Ambush – a participation game for up to 3 players

Theme:
The Tring Wargames Club game is based loosely on the Sharpe novels by Bernard Cornwell.
Lt Sharpe and Sgt Harper are leading the Light Company of the South Essex Regiment, with some riflemen from the 95th Light Regiment, on a mission to ambush a French supply train travelling the road somewhere on the Iberian Peninsular.

To Play:
Each player has control of a 5 man section of riflemen with a 5 man section of the light company.
Each player is awarded coins for each pack animal they capture, the player with the most coin after 6 turns is declared the winner.
The umpires will control the French forces.
Each Participation Game will probably last about 30 minutes if you are happy to stay with us.
Good luck and enjoy the game.

Saturday, 12 August 2017

Lost Tribes vs Stygian Dragon Rampant AAR

We played a couple of games of Dragon Rampant at the club last night with 36 point armies. Henry's Lost Tribes (a mix of Amazons, pygmies and warrior tribesmen) against my Stygian (from the now defunct Chronopia game).  It's amazing how the upgrades just eat points in DR, for my 36 points I just had a wizard, two big heroic beasties and 2 units of light foot. It was also a good excuse for me to dig out my fantasy terrain features that hadn't been used for a while. I've got a couple of burial mounds, a stone circle and stone tabletop tomb which I'd originally collected as strongholds for Hordes of the Things armies.

The first game was the Ringbearer scenario and I had the ring. I gave it to my Guardian (big beastie) but didn't keep him back so Henry assumed that the ring was with my Priestess (General Wizard) who was at the back. It was a fun game, but Henry's deployment let him down. While the bulk of his army attacked across the table, he tried a outflanking march with two units around a wood. Unfortunately he put his heavy foot (slower with better armour) on the flank and his light foot (fast with less armour) in the centre.

While his heavy foot plodded along I cut my way through the rest of the army. The other big beastie, the Embalmed, was particularly effective. Classed as elite foot Manslayer, it just chomped it's way through the pygmy light foot. In one round it scored 12 hits, with an armour of 2 half a unit of pygmies disappeared in one go! The Embalmed eventually died, but not before it had wiped out 3 units. By the time the flank attack arrived, they were all that was left of the army and a combination of shooting and spells weakened both units before closing in for the kill. One tribesman unit made a last ditch attempt to kill the ringbearer, but went for the wrong unit. Fortunately my Wizard was uphill and, although wounded, fought off two charges until help arrived. In the end all Henry's army was dead, I,d lost the Embalmed and a unit of light foot.

Ian joined us for the second game, which was very different, we played the Scared Mole of Ukkert and I had the treasure. I just had to get my stolen loot from one corner of the table to the opposite corner. A really bad leadership roll (three ones!) meant I had to test the loyalty of all my units, on a score of 1 they would desert and I managed to lose the Guardian before the game even started. I gave the loot to one of the faster moving light foot units and tried to rush them across the table. The Embalmed headed off to take on Henry's Pygmies whilst the rest of the army acted as speedbumps against the heavier stuff commanded by Ian. It almost worked but I got caught within a move of the escape point. My light foot got shot up by the pygmy boar riders then charged by a unit of heavy foot and wiped out. Ian then moved the treasure bearers behind a line of units. This time the larger size of the Lost Tribe army came to the fore, as there was just no way I could get to the treasure in time.

Two great games and a lot of fun and laughter. I'd found the magic to be quite effective, especially in the first game. Although Power Bolt appears the most effective spell, I found judicious use of Stronger Shield and Sharper Blades on my best melee units to be devastating in close combat.

 The Embalmed contemplates it's next meal.

 The pygmy boar riders pass a milestone (count the skulls, that's how many leagues to go!)

 Stygian spearmen approach the stone circle

 The Priestess prepares to zap someone

It was a quieter night with only two other games this week. A 15mm ACW Fire and Fury game set in New Mexico, hence the cacti.


And a 40K game on an impressive table (probably requiring a second mortgage)


Wednesday, 26 July 2017

Western Gunfight 2!

An alternative view of the action!

The Kidnap of the Bank Manager in Grahamtown

This game was played on 21 July 2017, using Graham’s scenario and his homebuilt rules.
A few pictures depict the action:-

Mark and Alan were both running Mexican bandido gangs, but in a spirit of total lack of cooperation, they quickly started a duel which lasted the entire battle and spelt doom for both sides. Here, Alan’s gang are headed by Vittorio in the centre and Esmeralda, his sidekick; both Vittorio and Esmeralda already have wound markers, and only Esmeralda will survive the battle.  Meanwhile, the henchman Il Brutto fends off a long range attack from Colin’s faction of armed hookers.  Colin’s shooting was phenomenal throughout; his faction accounted for no less than four of Alan’s alone, and also succeeded in holding off both Graham and Bill.

Mark’s bandidos duel with Alan’s, from the other end of the alleys off Main St.  At this point in the fight, Mark’s gang boss has run out into the middle of the street to get a clear shot at Esmeralda, and then fumbled his weapon. Unsurprisingly, Esmeralda took exception to this behaviour, and promptly shot him down.

Another view of Mark’s gang boss, standing alone in Main St outside the Chinese laundry. This end of Main St itself saw very little action until late in the battle;  Mark and Alan’s bandidos were busy duelling in the alleyways on one side, and Mark and Bill on the other.

Here you can see one of Mark’s minions attempting to sneak into a firing position against Bill’s faction.

Meanwhile, at the other end of town, Bill and Graham’s gangs are shooting it out across the side street, near the undertaker’s.

Colin and Bill’s gangs also got into a fire-fight across Main St, by the hotel. Almost incredibly, a couple continued to pose for a portrait photo throughout the battle, despite the bullets whistling by their ears. You can just see one of Colin’s gang in the hotel doorway, using the couple as human shields.

At last the stage arrived, bringing the banker into town. By this time, there weren’t many left of each faction to do much about it. Bill’s gang got the drop on Colin and Graham though, and almost the only figure still standing managed to hold up the stage driver and “persuade” him to drive off the table, for a convincing win.

Monday, 24 July 2017

Western Gunfight!

We played a 5-player shootout at club last week using my homemade rules. The scenario was that a rich banker was due in town on the noon stage and the local bad-boys have decided to kidnap him. They ride into town just before the stage is due, only to discover 4 other gangs have had the same idea. The object is to get control of the stage when it arrives (randomly rolled for after each turn after the third. Unfortunately, no-one knew whether the stage would stop at the hotel first, or one of the livery stables at either end of town. Once the stage was on the table, we would roll to see where it stopped, 1-5 and 16-20 for the respective livery stables and 6-15 for the hotel.

It was a bit of a bloodbath, everyone started off with a gang of 6 and by the time the stage arrived (turn 5) most of us were down to 1 or 2 men left! Colin's shooting was phenomenal, I think he only missed 3 shooting rolls the whole game.

A couple of high points, one of Colin's men jumping onto the back of the moving stage, in best Hollywood tradition, only to be shot off by Bill's last surviving gunman before he could make the driver stop. Then Mark's Mexican gang leader rolling a 20 (jammed gun!) whilst standing in the open, then being shot by Alan to the comment of "What do you expect, standing in the middle of the street fumbling with your weapon!" Cue schoolboy giggles all round.

In the end, the stage stopped by the first livery stable, Bill shot my last gunman as he ran for the stage, used a wild card (everyone got three one-off event cards to use) to frighten the horses so that they moved down a side street, out of view of the other players. He then jumped on the stage, stuck his gun in the drivers face and made him take the stage off the table with the startled banker still inside.


 I'll add some more pictures when I get some close ups from Alan.

Also being played at the club that night were 5 other games.

                                                  10mm Napoleonic using Black Powder.

                                       28mm Napoleonic skirmish in Spain using Chosen Men.

                                                   20mm WW2 using Rapid Fire.

There was also a Warhammer 40K game, but when I got home I realised I hadn't taken a picture of that!

Saturday, 1 July 2017

Trying out En Garde

Played our first couple of games with En Garde, the swashbuckling rules from Osprey. I'd had a copy for some time, but other things kept getting the way of trying them (Frostgrave, The Men Wh0 Would Be Kings, The Pikeman's lament etc)For the first try we kept it simple, 100 points each of Border Reivers with no attributes other than Commander. We also didn't bother with a scenario, just a simple "two gangs come into town and kill each other" set up. The purpose was to get the hang of the rules.

 The peaceful border village of Camkirk on Beckside

                                            The villagers go about their business

                                        Or relax over a pint outside the tavern

                                                           Watch out...Scots Reivers!

                            
                         Too busy at the tavern the Scots do not notice the English Reivers arrive

                                                Fighting in the village square

                                              Get yourselves oot the tavern!                                    

                                                  Trying to sneak up on the Scots

The forces were the same, a rank 4 leader with a sword, one rank 3 with sword and pistol, two rank 2 with sword and buckler and three rank 1, one with halberd, two with sword and matchlock.

We played two games, which both worked well. As with any rules, the first games a a steep learning curve. Most of the rules made sense, although we realised we had missed things in the first game (as usual!) The close combat was a bit clunky in the first game, but much smoother the second time around.

We may well produce our own QRS, as we felt there were various things missing, which we found we would have needed. For example the QRS tells you that a matchlock is Inaccurate but nothing on the QRS explains that effect. In fact there is nothing in the shooting section in the rulebook that explains Inaccurate, we eventually found it in the weapons section. Minor issues, and after a few games we won't need to look it up. But we really did enjoy the games, so much so that Henry is off to buy his own copy of the rules. I've also ordered a 3x3 gaming mat to improve the look!

Next time we will try attributes and scenarios.